Friday, 13 November 2015

Inoculate sterilized grains with liquid culture

Well, it's time to inoculate your jars of seeds with mycelium, in order to achieve mushroom spawn. First, sterilize a syringe, wrapping it in tinfoil and putting it in a pressure cooker for 15-20 minutes, as seen in this post. Once ready, we remove the syringe from the pot without unwrapping it, and get ready to work in an environment as clean as possible. It is good to spray in the air a bit of cleaning alcohol or disinfectant spray (Oust and Lysol work well) before you start.


First of all, carefully clean the silicone inoculation port with a wad of paper or cotton, soaked in hydrogen peroxide. Than, take another swab and hold it onto silicone port for 5-10 minutes. This is not necessary, but helps to kill any remaining contaminants.


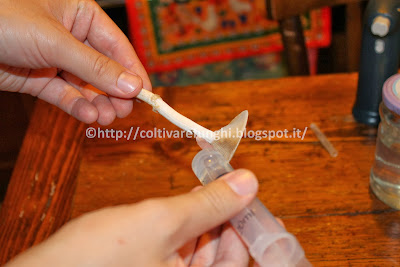
At this point, you have to work as quickly and aseptic as possible: unwrap the syringe and quickly insert the needle into the injection port. Then tilt the jar enough so the needle reaches the liquid. You have to be always very careful not to wet the filter, for the reasons we know. Our goal is to be able to suck up as much liquid mycelium as possible with the syringe: during growthin the jar, mycelium tends to form a compact mass, which does not easily pass through the needle. For this reason we will have to "break" the mass of mycelium filaments, by sucking and blowing the liquid several times with the syringe. The whole operation must obviously made without removing the needle from the jar. 


Once you manage to suck a decent amount of mycelium, you can remove the needle from the jar. At this point, it is good to sterilize the syringe needle with the flame, before inoculating into the jar. If you work fast you do not need to, but it's always better to be safe. Once done, let it cool (about 10 seconds) then remove the foil from the jar of seeds, and will inject the LC.


By being careful, it is possible to inoculate several jars with a single syringe of LC, just that each gets some liquid mycelium. Obviously, the more it will be, the faster colonization you'll have. And of course, it is good to sterilize the needle after each step.
If everything went the right way, in a matter of 4-7 days you will see mycelium growing on seeds.


As you can see, mycelium begins to develop at the point where the LC was injected, just under the inoculation port. You can speed up the growth mixing the grains by shaking the jar: after a few days growth will start again from the colonized grains, speeding up the whole process. To do this, beat the bottom of the jar several times against a rubbery surface, like a tire or a sole of an athletic shoe. Once all the seeds will be invaded by the mycelium, the jar will be ready to use.
If something goes wrong, you will know: if bacterial contamination, seeds will get a slimy appearance and an unpleasant smell. In case of mold contamination, however, you will see a powdery mildew, variable in color, instead of, or along with the mycelium. Obviously, in all these cases everything is to be redone. Here's a picture to give you an idea: in this case mycelium has grown, but together with an unwanted guest, competing for its food...


Well: if your jar do NOT seems like the above one, but instead of all white mycelium, as in the photo below, then it will be ready to use :)


See you in the next guide ;)

Monday, 9 November 2015

Making mushroom spawn

Once our LC is ready (you'll probably need several attempts), it's time to use it. However, it isn't a good idea to inject it directly on the final substrate (straw, sawdust, wood logs etc.). This is because growth would be too slow, exposing all at risk of contamination, or it may not even start. You will then need an intermediate step, in order to give our mycelium some extra advantage, allowing it to grow quickly and aggressively. This intermediate step is, in fact, the preparation of the "spawn". Mushroom spawn is a way to multiply mycelium, obtaining enough of it to be able to inoculate the final substrate. The most widely used method is to use seeds of cereals, hydrated and sterilized: their high protein and carbohydrates content will allow the mycelium to grow vigorously and rapidly.
However, seeds are not (at least for edible mushroom species) suitable to allow fruiting, at best they would get only a few mushroom, but we want great crops, right? :)
Seeds must necessarily be used to inoculate the final substrate: in this way they act as a nutritional supplement, and ensure a rapid colonization, that LC alone would not allow.
Best cereal (and most used) to use as spawn is rye, but also grain, sorghum, millet and barley will be fine. You can find all of them in wholesale seeds stores. You can also use for parakeets feeding, which often consists mainly of millet.
In this guide we will use rye.


First of all, you have to measure out the seeds, pouring them into jars filling them barely less than half. In fact, hydrated rye will double in volume, and will completely fill the jars. Lids should be prepared by following this guide.


 Pour the contents of all the cans in a pretty big pot...


... and fill it with hot water, until completely submerge the seeds. This phase has a double function: hydrate the seeds, until they reach the right level of humidity inside, and to germinate endospores, which could othersise withstand sterilization.


Close the pot with the lid and wait 24 hours. When uncovering again, you will notice that a light foam formed on the surface, and the water seems to fizz. This is because contaminant spores, contained in the seeds germinated, and bacteria begun to ferment. Drain the seeds (a colander is  just fine) and wash them for a while under cold water (to wash away any dirt). As you can see, the grains appear dramatically larger, because of the absorbed water.


At this point, if we had used the mile, which has much smaller grains , we should boil it for at least 15 minutes so that it absorbs more water and will not excessively dry out during mycelium colonization. But this operation with rye is not necessary, because grains are big enough to absorb the necessary water just with soaking. 
Then fill the jars, up to 1-2 cm to the lid.


Cover jars with an aluminum foil sheet, stopping it with a rubber band.


Now sterilize everything in a pressure cooker, for at least an hour (an hour and a half for safety) to 15 PSI. A solid content in fact require a longer time compared to liquids. In a hour and a half we will be sure that the center of each jar has reached 120 degrees for a period sufficient enough to kill all pests.


Let the pot cool up to ambient temperature (it takes several hours). Once cool,jars are ready to inoculate!


Grains get slightly smaller during sterilization, yet they retain a sufficient amount of humidity to be succesfully eaten by our mycelium.

Well, and this is done. In the next post we will see how to inoculate our nice jars :)

Liquid culture: phase 3 - cloning a mushroom

There are many ways to inoculate a jar of nutrient solution, as we have prepared: the simplest is injecting into a bit of already existing LC, but this implies that you already have a syringe of liquid mycelium, maybe bought from a specialized vendor.
In this post we will talk about cloning technique , however, that will allow us to create our own culture, from an already formed fungus. Although the title sounds like a science-fiction movie, it's all true: we will in fact implement a real cloning, fortunately much simpler than "Dolly the sheep" one :). Anyway it's still not a simple procedure, and we must use all possible precautions to avoid something going wrong.
Mycelium has the ability to grow back from the tissue of the fungus by himself generated. As an example, it's like if cutting a slice of apple and burying it, this would put roots and give life to a nice shrub, without the need for any seed. By cutting a piece of mushroom and placing it in a supportive environment (presence of nutrients and absence of competing bacteria and molds) mycelium will re-grow, and after a few days we will see the piece of mushroom tissue covered with a white fuzz.
In our case, the goal is to get a piece of mushroom and be able to put it in the jar. The problem is that, in order to do that, we cannot open the cover lid. In fact, in the normal air we continuously breathe, million spores of bacteria and molds fluctuate, and the risk that someone enters inside at the time of the opening would be very high. Many kinds of mold, in particular, grow very fast, and they would not give to our mycelium even the chance to born. We will therefore take the fragment of the fungus with a syringe, and literally inject it inside the can, through the inoculation silicon port that we previously prepared. The procedure must be performed with extreme caution, in a cleaner as possible environment, taking the piece of mushroom from a particularly clean spot, and using a sterile syringe. But now that's enough with talking, and let's see how to proceed:

First we will have to engage in our 18G needle syringe, and then sterilize it. Generally, syringes are made of polypropylene, a kind of plastic that withstands with no problems high temperatures. When brand new, syringes are already sterile, but by changing the needle in open air the could contaminate, then by sterilizing them, you risk less. To sterilize them, proceed as follows:

Graft the 18G needle (smaller ones would not work)


Then wrap them in tin foil...


... and sterilize them in a pressure cooker. They should not be immersed in water, so let the steam do the job. You can safely sterilize syringes and jars together, because 15 minutes is more than enough.


Once the syringe is sterilized, we can proceed to working. That's what we need:


The can be inoculated, the sterilized syringe, the flame gun (or you can use the flame from the stove burner), a bit of hydrogen peroxide or alcohol, and a fungus (the youngest possible) from which to draw a "carrot" of tissue. Not all kinds of fungus are suitable for cloning with syringe, such as the Oyster mushroom that has a very fibrous flesh that hardly fits in the needle, making things even more difficult. In this case I used a swordbelt (A. aegerita). This technique is best used to clone cultivated mushrooms, bought at the supermarket. Wild ones are usually very dirty, and it's better to use agar to do this, otherwise occuring in a very high failure rate.
The best point for picking up the piece of tissue is the stem. Then, we proceed to clean the thoroughly area with a piece of paper / cotton ball, soaked in hydrogen peroxide or alcohol.


Unwrap the syringe, take off the rubber band and the aluminum foil from the jar, and suck a few milliliters of solution. Be careful not to wet the filter, otherwise you'll need do everything again from the beginning.


Immediately after, place a bit of paper soaked in oxygenated water/alcohol above the injection port:


Then we sterilize the needle with the flame, until it becomes completely red. Be careful not to melt the plastic syringe.


Then we wait for the needle to cool (about 10 seconds) and "pierce" the fungus in the freshly cleaned part. Avoid touching the spores.


If cloning a mushroom larger than a Pleurotus, we can break it in half and take the tissue from the inside, which is typically much cleaner.
At this point, if we did everything properly (and also helped by a little of luck) a piece of fungus will be left inside the syringe needle. So we proceed to inject all inside the jar, removing the swab over silicon immediately before threading the needle.


If everything went the right way, we can see the fragment floating in the liquid.


Within 5-7 days, we should be able to see a thin hair coat aroundthe piece of fungus. If we did something wrong, within a coupl days we will see the liquid become white-gray dirt, and becoming smelly.

Here's a picture to show you what to expect in case of success:


As you can see, mycelium grows directly from the tissue fragment. You want to speed up the growth of the mycelium, it will be enough to stir from time to time the can, in order to break the mycelium in numerous filaments. Each one of them begins to grow again, speeding up the process.
The important thing is to always be careful not to wet the filter, because the honey contained in the liquid favor the contamination of the solution.
When the liquid becomes completely transparent, it will mean that our LC is ready to use, because mycelium has consumed all the contained nutrients.

Liquid culture: phase 2

Once the caps are prepared according to the above guide, we can go to the next step: the making of the solution suitable to mycelium cultivation. As already mentioned, you can use different kinds of nutrients: honey, maple syrup, malt extract, raw cane sugar (refined sugars do not work well), corn syrup, etc.. Recently I'm going very well with agave syrup. The preference, in any case, must be given to the substance which, after being mixed with water, will leave the solution the more transparent as possible. In fact, an occuring bacterial contamination would be noticed by a sudden clouding of the solution, which would become milky and smelly. By keeping the solution clear, it is possible to notice it in time, and start again as soon as possible, without wasting time.
This guide will explain the classical background with honey, that actually it's not the best ingredient ever, but it works well enough. Feel free to experiment with other "ingredients";)
The percentage of nutrients to be added is quite low, and ranges from 2% to 4%. The rule "more nutrients = faster growth." Doesn't work. In fact, by adding too much honey, growth would be very slow, or not even start.
Correctly calculate the distilled water and pour it in the can (if you don't have it you can use gas free bottle water). Probably it will get yellow after sterilization, but will not affect the growth of the mycelium. Based on the amount of water used, add the honey. With a precision scale it's very easy to measure the right amount, otherwise you can put a generous teaspoon per 300 ml. In our case, for 300 ml we need, at 4%, 12 grams of honey. Let's use 9-10 for safety.


Stir until the honey has completely dissolved in the water. Then put an aluminum foil sheet on top of the cover, and fix it with a rubber band (those thick enough, easily withstand sterilization)


At this point the solution must be sterilized. In fact, sugar contained in honey is not only liked by our (future) mycelium, but also from a multitude of bacteria and molds, whose spores are certainly already in the can, and would take over. In any event, the 120° (248 F) degrees of the pressure cooker will be sufficient to get rid of them. So we put our jar into the pot, and pour one to two inches of water on the bottom. They may seem few, but are more than enough, because it will be the steam generated inside the pot to transmit heat to the cans.


The picture shows one jar into the pot, but the more you put the better, because you'll amortize the cost of the fuel :) My pot is equipped with spacers separating the jars from the water; if yours does not have one, put a cloth on the bottom to prevent the cans to dance tip-tap during sterilization. You must also avoid touching because they could break, if they're not sufficiently distant from each other, separate them with another cloth.
At this point we close the pot and sterilize for no more than 15 minutes (in addition may be formed of residues in the liquid, which prevent colonization), starting to count them from the "whistling" of the pot. If you have a pot with pressure gauge, 10 psi are more than enough.


After 15 minutes we turn off the burner. Let compensate the pressure inside the pot without opening the valve. Once the pressure has dropped to zero, we can remove the jars from the pot (be careful not to burn yourself!) And let them cool. This done, we have finished this stage. Here's what a ready to inoculate jar looks like:


As you can see, the liquid is slightly opaque, because of the honey. Once inoculated, if all goes well, you will notice that it will become more and more transparent, as the mycelium consume the nutrients.

Well, for the moment this phase is completed, let's pass to the next;)

Liquid culture: phase 1

As already said, liquid culture consists of mycelium grown in a solution of water and nutrients, which can be of various kinds (to begin we will use the honey). As containers, we will use normal cans, like those we saw in the previous post. However, you must make a fix to the cap: we'll need to add a filter to allow gas exchange, and create an injection port site that will allow us to inoculate jars and vacuum the mycelium at the right time. The process is very simple.

We take our beautiful, brand new jar:


Remove the lid and (with a drill, a dremel, a screwdriver used as a chisel or whatever you want) make two holes on either side of the can, a smaller and a larger one (beware not to pierce the thread!).


We apply a bit of silicone, both above and below the smaller hole, shaping it so that it remains a bit in relief on both sides:


Once the silicone has dried (it takes a few hours) make a scoop of polyfill and get it stuck in force in the other bigger hole:


 Well, our cap is ready. So we can take to the next step, which I'll explain in the next post;)

Base equipment needed to start

Generally the first technique one learns is liquid culture. Not because it is the simplest, (well perhaps it's not), but it is achievable with easily foundable materials. Learning to work with agar jelly is the next step, but requires bit more expensive equipment and maybe a little more experience too, and we'll talk later about it.
In this post I will list the materials that you have to get to be able to implement your first experiments with liquid culture. This stuff is not difficult to find, but that is not granted to have at home :) Let's start:


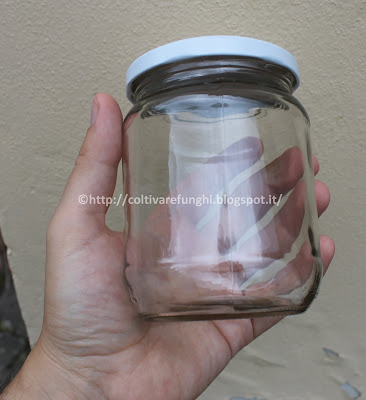
1) Glass jars any, as these are fine. The thicker the glass is, the better results you'll have, due to much more resistance to sterilization cycles.


2) Polypropylene syringes (a type of plastic that is resistant to high temperatures), 10 or 20 ml, and that you will easily find in any pharmacy.


3) 18G needles, you will find these at the pharmacy aswell. Their color is rose, and are larger than those usually found with syringes.


4) Aquarium filter wool (polyfill). It is a synthetic wool that you can find in pet stores, or at the supermarket. Often it is used to stuff pillows.


6) Honey. The wildflower is just fine but the acacia is the clearest, and works better. You can also use Corn syrup or Maple syrup: actually they work even better. Then I will explain the details.


7) Distilled water; also tap water works, but often turns yellow after sterilization.


8) A pressure cooker. For this technique any is fine, no need a big as mine ;)


9) Finally, silicon paste, aluminum foil and a bit 'of elastic bands of medium width. I guess there's no need for pictures :)

10) Optional: they are not essential but are good to have: a precision scale like this, you are on the web a few bucks. It will help to measure out the honey, alternatively we can do "by eye" ...


... and a kitchen flame torch like this one. It will help to sterilize syringe needle. Alternatively we can use the heat of the kitchen stove.


In the next posts I will explain how to use all this good stuff.