There are many ways to inoculate a jar of nutrient solution, as we have prepared: the simplest is injecting into a bit of already existing LC, but this implies that you already have a syringe of liquid mycelium, maybe bought from a specialized vendor.
In this post we will talk about cloning technique , however, that will allow us to create our own culture, from an already formed fungus. Although the title sounds like a science-fiction movie, it's all true: we will in fact implement a real cloning, fortunately much simpler than "Dolly the sheep" one :). Anyway it's still not a simple procedure, and we must use all possible precautions to avoid something going wrong.
Mycelium has the ability to grow back from the tissue of the fungus by himself generated. As an example, it's like if cutting a slice of apple and burying it, this would put roots and give life to a nice shrub, without the need for any seed. By cutting a piece of mushroom and placing it in a supportive environment (presence of nutrients and absence of competing bacteria and molds) mycelium will re-grow, and after a few days we will see the piece of mushroom tissue covered with a white fuzz.
In our case, the goal is to get a piece of mushroom and be able to put it in the jar. The problem is that, in order to do that, we cannot open the cover lid. In fact, in the normal air we continuously breathe, million spores of bacteria and molds fluctuate, and the risk that someone enters inside at the time of the opening would be very high. Many kinds of mold, in particular, grow very fast, and they would not give to our mycelium even the chance to born. We will therefore take the fragment of the fungus with a syringe, and literally inject it inside the can, through the inoculation silicon port that we previously prepared. The procedure must be performed with extreme caution, in a cleaner as possible environment, taking the piece of mushroom from a particularly clean spot, and using a sterile syringe. But now that's enough with talking, and let's see how to proceed:
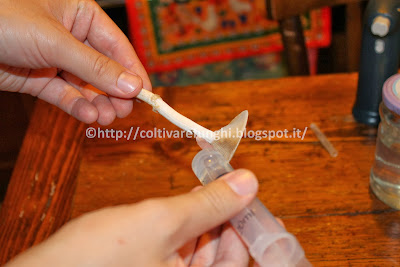
First we will have to engage in our 18G needle syringe, and then sterilize it. Generally, syringes are made of polypropylene, a kind of plastic that withstands with no problems high temperatures. When brand new, syringes are already sterile, but by changing the needle in open air the could contaminate, then by sterilizing them, you risk less. To sterilize them, proceed as follows:
Graft the 18G needle (smaller ones would not work)
Then wrap them in tin foil...
... and sterilize them in a pressure cooker. They should not be immersed in water, so let the steam do the job. You can safely sterilize syringes and jars together, because 15 minutes is more than enough.
Once the syringe is sterilized, we can proceed to working. That's what we need:
The can be inoculated, the sterilized syringe, the flame gun (or you can use the flame from the stove burner), a bit of hydrogen peroxide or alcohol, and a fungus (the youngest possible) from which to draw a "carrot" of tissue. Not all kinds of fungus are suitable for cloning with syringe, such as the Oyster mushroom that has a very fibrous flesh that hardly fits in the needle, making things even more difficult. In this case I used a swordbelt (A. aegerita). This technique is best used to clone cultivated mushrooms, bought at the supermarket. Wild ones are usually very dirty, and it's better to use agar to do this, otherwise occuring in a very high failure rate.
The best point for picking up the piece of tissue is the stem. Then, we proceed to clean the thoroughly area with a piece of paper / cotton ball, soaked in hydrogen peroxide or alcohol.
Unwrap the syringe, take off the rubber band and the aluminum foil from the jar, and suck a few milliliters of solution. Be careful not to wet the filter, otherwise you'll need do everything again from the beginning.
Immediately after, place a bit of paper soaked in oxygenated water/alcohol above the injection port:
Then we sterilize the needle with the flame, until it becomes completely red. Be careful not to melt the plastic syringe.
Then we wait for the needle to cool (about 10 seconds) and "pierce" the fungus in the freshly cleaned part. Avoid touching the spores.
If cloning a mushroom larger than a Pleurotus, we can break it in half and take the tissue from the inside, which is typically much cleaner.
At this point, if we did everything properly (and also helped by a little of luck) a piece of fungus will be left inside the syringe needle. So we proceed to inject all inside the jar, removing the swab over silicon immediately before threading the needle.
If everything went the right way, we can see the fragment floating in the liquid.
Within 5-7 days, we should be able to see a thin hair coat aroundthe piece of fungus. If we did something wrong, within a coupl days we will see the liquid become white-gray dirt, and becoming smelly.
As you can see, mycelium grows directly from the tissue fragment. You want to speed up the growth of the mycelium, it will be enough to stir from time to time the can, in order to break the mycelium in numerous filaments. Each one of them begins to grow again, speeding up the process.
The important thing is to always be careful not to wet the filter, because the honey contained in the liquid favor the contamination of the solution.
When the liquid becomes completely transparent, it will mean that our LC is ready to use, because mycelium has consumed all the contained nutrients.


No comments:
Post a Comment